Stories are the standard unit of work in Shortcut. An Epic a collection of said stories.
This article will aim to go over the elements and actions a user can interact with within an Epic.
Create Epic
Select the Create Epic action from the dropdown in the upper left of the UI. Once selected, you will see the modal shown below where you can enter in an Epic Title, Description, and other associated metadata.
Epic Title
Click the pencil next to the Epic Title to open the title box. Once edited, hit enter or click outside of the title box to save the new title.
There is no character limit to the content of an Epic title.
Epic Description
Once an Epic is created, click the button to enter description. You can also shift+click anywhere in the description to start editing.
There is no character limit to the content of the description. It can be as long or short as you need it to be. Story descriptions support both Markdown and HTML.
Story Table
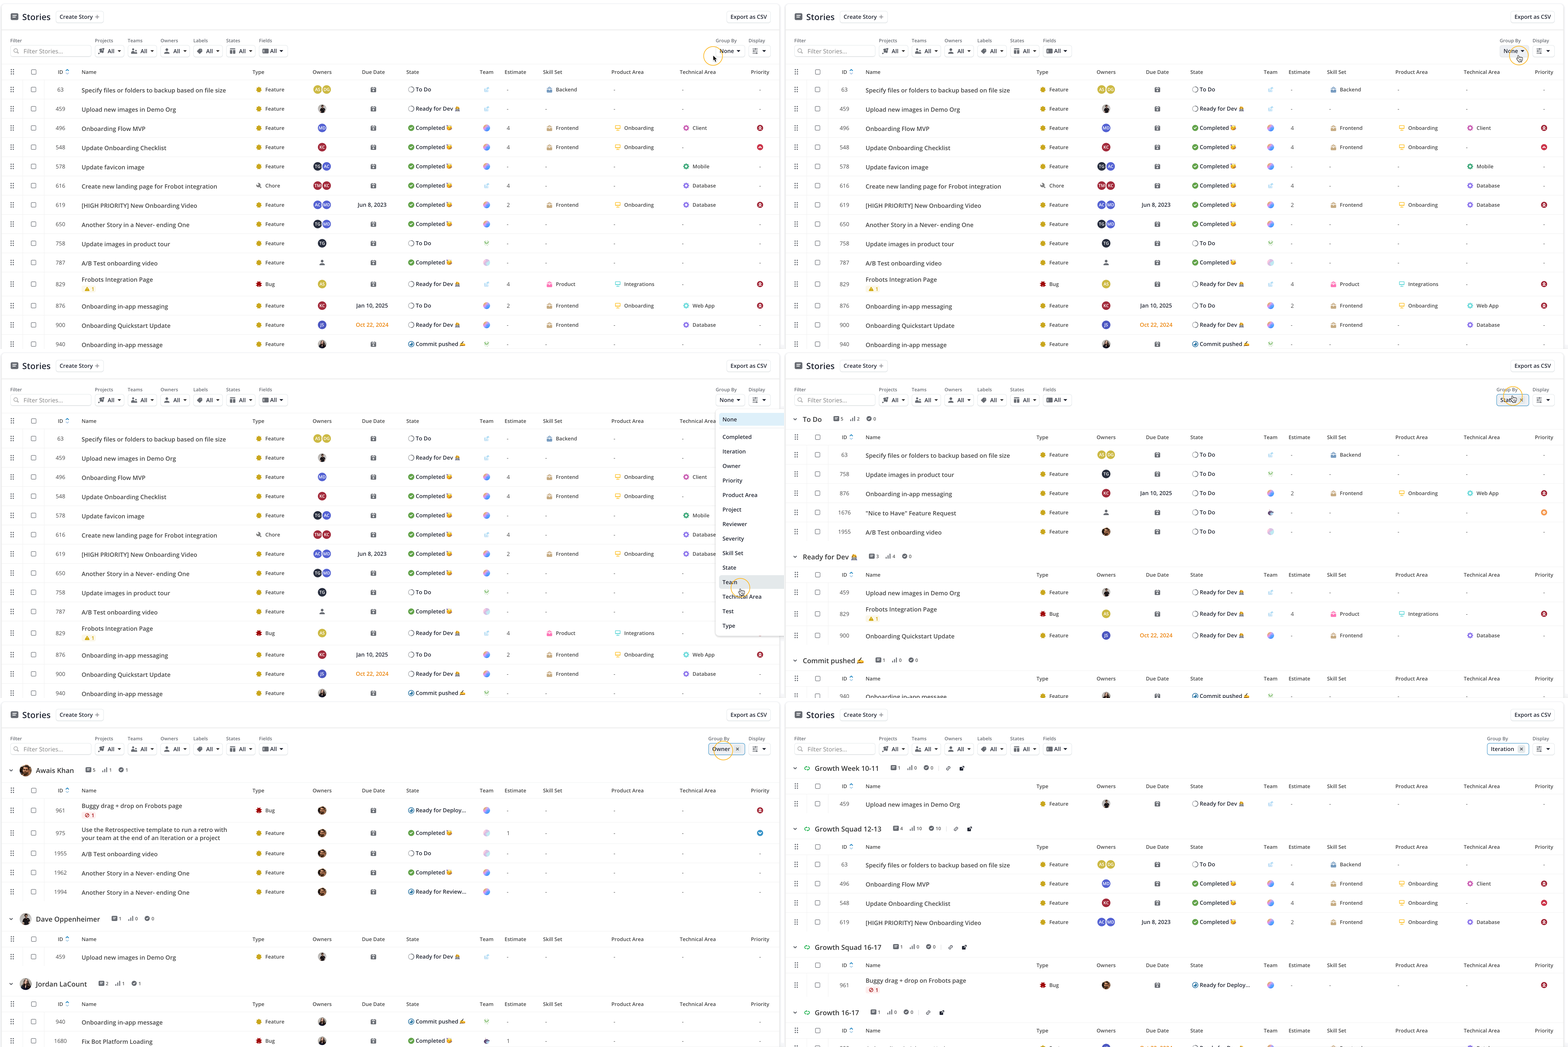
An Epic is a collection of Stories. Within the Epics page, this collection of stories is shown in a table view.
At your disposal is a search tool, filters, group by, and display options.
Search Stories
The Search bar in the filter section functions as you would expect, you can search for Stories by title. In addition to this, this search can function just like our standard search bar throughout Shortcut. This means Search Operators work here and allow you to filter the table more granularly. For example, you can search by Requester or by Story type. Please see our documentation for a list of available Search Operators.
Filter Stories
Stories may also be filtered by a number of attributes shown in the filter section. These filters work in conjunction with any filters that may have been used in the search bar.
Grouping Stories
By default, Stories shown on the Stories tables are not grouped. You can change this grouping by clicking the Group By button on the upper right-hand side of the filters and selecting Iteration.
We expect to increase the number of items you can group by in the future.
Change Priority of Stories
You can drag and drop Stories on the individual Epics page to change their priority. Changing a Story's priority in an Epic will also change its priority on the Stories page.
Priorities in Shortcut are structured vertically, so the higher up in the table or column the Story is, the higher its priority. To change the priority of Stories in an individual Epics page, first choose the Table view.
Then click on the Priority tab at the top of the table to sort the Stories by priority:
You'll notice that when sorted by priority, Stories are first organized by Workflow State, then by priority -- this is because you can only drag a Story to change its priority within the same workflow state. You'll also see that stories in a Done workflow state can't be reordered, since they've already been completed.
To reorder a Story in the table, click on the directional icon on the left of the Story entry, then drag and drop the Story where you want it:
Epic Comments
Discussion about an Epic can take place in the Comments section of the Epic page. At the moment, unlike Story comments, Epic comments are threaded, which allows separate conversation to occur on the same section. The comments field supports text, markdown, emoji, files, links, and code snippets. Clicking into the comment text area will provide you with numerous helpers.
If you happen to leave an Epic without saving your changes, your changes will be automatically saved.
Mention a user in a comment
You can reference or call attention to a team member in a comment by typing "@" and then typing or selecting the person's username in the dropdown. They will receive an email notification (and Slack DM as well, if enabled).
Add an image to a Story Comment
Upload File Limits
The web app has a 50MB file upload limit.
An image attachment is restricted in three ways:
-
Images attached to a story are scaled down to at most 360 pixels wide and 240 pixels high.
-
Images attached to a comment or description are scaled down to at most the width of the comment element, and at most 380 pixels high.
-
Clicking on an image to display it hi-res in a lightbox causes it to be scaled to the size of the browser window. (So very tall and skinny images can become difficult to see)
You can add images to the comments field in three ways:
1) Click the image icon to select a file to upload
2) Drag and drop the image from your computer into the comment area. Hold the Shift key to bring up the optional image cropper.
3) Copy/paste the image from your clipboard (NOTE: Copy/paste is currently only supported in Chrome. It will be added to other browsers when it becomes available in the spec).
Animated GIFs will become static GIFS when copy-pasted.
Link users to a Story comment
Updated